How To Redirect To Spring Security OAuth2 Behind a Gateway/Proxy — Part 2: Hiding The App Behind A Reverse-Proxy (Aka Gateway)
This post is part of a series of Mini-Howtos, that gather some help, to get you started, when switching from localhost to production with SSL and a reverse-proxy (aka gateway) in front of your app, that forwards the requests to your app that listens on a different name/IP, port and protocol.
In This Series We…
- Run the official Spring-Boot-OAuth2-Tutorial as a container in docker
- Simulate production by hiding the app behind a gateway (this part)
- Show how to debug the oauth2-flow for the whole crap!
- Enable SSL on our gateway
- Show how to do the same with Facebook, instead of GitHub
I will also give some advice for those of you, who are new to Docker – but just enough to enable you to follow.
This is part 2 of this series, that shows how to run a Spring-Boot OAuth2 App behind a gateway – Part 1 is linked above.
Our Plan: Simulating A Production-Setup
We will simulate a production-setup by adding the domain, that will be used in production – example.com in our case -, as an alias for localhost.
Additionally, we will start an NGINX as reverse-proxy alongside our app and put both containers into a virtual network. This simulates a real-world secenario, where your app will be running behinde a gateway together with a bunch of other apps and will have to deal with forwarded requests.
Together, this enables you to test the production-setup of your oauth2-provider against a locally running development environment, including the configuration of the finally used URIs and nasty forwarding-errors.
To reach this goal we will have to:
- Reconfigure our oauth-provider for the new domain
- Add the domain as an alias for localhost
- Create a virtual network
- Move the app into the created virtual network
- Configure and start nginx as gateway in the virtual network
By the way: Any other server, that can act as reverse proxy, or some real gateway,like Zuul would work as well, but we stick with good old NGINX, to keep it simple.
Switching The Setup Of Your OAuth2-Provider To Production
In our example we are using GitHub as oauth2-provider and example.com as the domain, where the app should be found after the release.
So, we will have to change the Authorization callback URL to
http://example.de/login/oauth2/code/github
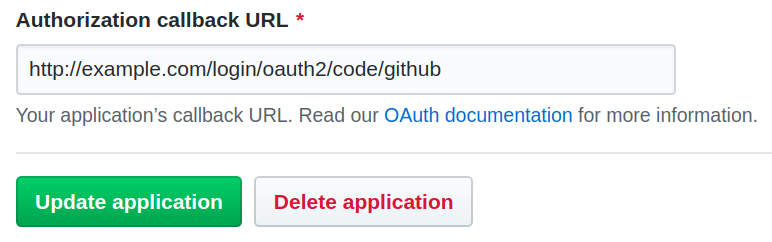
O.k., that’s done.
But we haven’t released yet and nothing can be found on the reals server, that hosts example.com…
But still, we really would like to test that production-setup to be sure that we configured all bits and pieces correctly!
In order to tackle this chicken-egg-problem, we will fool our locally running browser to belive, that example.com is our local development system.
Setting Up The Alias for example.com
On Linux/Unix this can be simply done by editing /etc/hosts.
You just have to add the domain (example.com) at the end of the line that starts with 127.0.0.1:
127.0.0.1 localhost example.com
Locally running programms – like your browser – will now resolve example.com as 127.0.0.1
Create A Virtual Network With Docker
Next, we have to create a virtual network, where we can put in both containers:
docker network create juplo
Yes, with Docker it is as simple as that.
Docker networks also come with some extra goodies. Especially one, which is extremly handy for our use-case is: They are enabling automatic name-resolving for the connected containers. Because of that, we do not need to know the IP-addresses of the participating containers, if we give each connected container a name.
Docker vs. Kubernetes vs. Docker-Compose
We are using Docker here on purpose. Using Kubernetes just to test / experiment on a DevOp-box would be overkill. Using Docker-Compose might be an option. But we want to keep it as simple as possible for now, hence we stick with Docker. Also, we are just experimenting here.
You might want to switch to Docker-Compose later. Especially, if you plan to set up an environment, that you will frequently reuse for manual tests or such.
Move The App Into The Virtual Network
To move our app into the virtual network, we have to start it again with the additional parameter --network.
We also want to give it a name this time, by using --name, to be able to contact it by name.
You have to stop and remove the old container from part 1 of this HowTo-series with CTRL-C beforehand, if it is still running – Removing is done automatically, because we specified --rm
:
docker run \
  -d \
  --name app \
  --rm \
  --network juplo \
  juplo/social-logout:0.0.1 \
  --server.use-forward-headers=true \
  --spring.security.oauth2.client.registration.github.client-id=YOUR_GITHUB_ID \
  --spring.security.oauth2.client.registration.github.client-secret=YOUR_GITHUB_SECRET
Summary of the changes in comparison to the statement used in part 1:
-
We added
-dto run the container in the background – See tips below… -
We added
--server.use-forward-headers=true, which is needed, because our app is running behind a gateway now – I will explain this in more detail later -
And: Do not forget the
--network juplo, which is necessary to put the app in our virtual networkjuplo, and--name app, which is necessary to enable DNS-resolving. -
You do not need the port-mapping this time, because we will only talk to our app through the gateway.
Remember: We are hiding our app behind the gateway!
Some quick tips to Docker-newbies
-
Since we are starting multiple containers, that shall run in parallel, you have to start each command in a separate terminal, because
CTRL-Cwill stop (and in our case remove) the container again. -
Alternatively, you can add the parameter
-d(for daemonize) to start the container in the background. -
Then, you can look at its output with
docker logs -f NAME(safely disruptable withCTRL-C) and stop (and in our case remove) the container withdocker stop NAME. -
If you wonder, which containers are actually running,
docker psis your friend.
Starting the Reverse-Proxy Aka Gateway
Next, we will start NGINX alongside our app and configure it as reverse-proxy:
-
Create a file
proxy.confwith the following content:upstream upstream_a { server app:8080; } server { listen 80; server_name example.com; proxy_set_header X-Real-IP $remote_addr; proxy_set_header X-Forwarded-For $proxy_add_x_forwarded_for; proxy_set_header X-Forwarded-Proto $scheme; proxy_set_header Host $host; proxy_set_header X-Forwarded-Host $host; proxy_set_header X-Forwarded-Port $server_port; location / { proxy_pass http://upstream_a; } }- We define a server, that listens to requests for the host
example.com(server_name) on port80. - With the
location-directive we tell this server, that all requests shall be handled by the upstream-serverupstream_a. - This server was defined in the
upstream-block at the beginning of the configuration-file to be a forward toapp:8080 appis simply the name of the container, that is running our oauth2-app – Rembember: the name is resolvable via DNS8080is the port, our app listens on in that container.- The
proxy_set_header-directives are needed by Spring-Boot Security, for dealing correctly with the circumstance, that it is running behind a reverse-proxy.
proxy_set_header-directives in more detail. - We define a server, that listens to requests for the host
-
Start nginx in the virtual network and connect port
80tolocalhost:docker run \ --name proxy \ --rm \ --network juplo -p 80:80 \ --volume $(pwd)/proxy.conf:/etc/nginx/conf.d/proxy.conf:ro \ nginx:1.17This command has to be executed in the direcotry, where you have created the file
proxy.conf.-
I use NGINX here, because I want to demystify the work of a gateway
traefik would have been easier to configure in this setup, but it would have disguised, what is going on behind the scene: with NGINX we have to configure all manually, which is more explicitly and hence, more informative
-
I use NGINX here, because I want to demystify the work of a gateway
- We can use port
80on localhost, since the docker-daemon runs with root-privileges and hence, can use this privileged port – if you do not have another webserver running locally there. $(pwd)resolves to your current working-directory – This is the most convenient way to produce the absolute path toproxy.conf, that is required by--volumeto work correclty.- Because we set the alias
example.comto point atlocalhostyou should now be able to open your app ashttp://example.comin a locally running browser - You then should be able to login/logount without errors
- If you have configured everything correctly, neither your app nor GitHub should mutter at you during the redirect to GitHub and back to your app
If you have reproduced the receipt exacly, your app should be up and running now. That is:
Whats next… is what can go wrong!
In this simulated production-setup a lot of stuff can go wrong! You may face nearly any problem from configuration-mismatches considering the redirect-URIs to nasty and hidden redirect-issues due to forwarded requests.
Do not mutter at me… Remember: That was the reason, we set up this simulated production-setup in the first place!
In the next part of this series I will explain some of the most common problems in a production-setup with forwarded requests. I will also show, how you can debug the oauth2-flow in your simulated production-setup, to discover and solve these problems
Very nice! Thank you for such informative post. Waiting for your part 3 and 4 of this series.